

No more supermarket bread: I mill my own grain now
I’m fed up with mass-produced bread. That’s why I ground flour at home to make my own wholegrain bread. Here’s how I get it done and dusted.
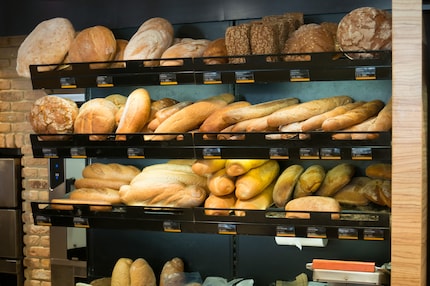
«Do we need 'bread'?» I ask my husband at the supermarket using air quotes with a smirk. For us, the ingredients (article in German) in industrial baked goods have little to do with real bread.
Source: Shutterstock/aerogondo2
That’s why we’ve been baking our own for a long time. But that’s not enough. Since I’m an «all or nothing» kind of person, I’d like to go all-in on the bread baking game going forward and grind my own flour. Grain is about the same price as buying pre-packaged flour. But the wholegrain bread that I bake with it is much better for you.
That’s why I’m testing Schnitzer’s Cerealo 200 grain mill for a few weeks (website in German). Its volume (41 × 28 × 26 centimetres) and weight (10.35 kilogrammes) are impressive, and its output is equally remarkable. The machine apparently produces 200 grammes of flour per minute with its 600-watt motor. That, and the many positive reviews, including of related models, were what convinced me.

Prep: the knife test
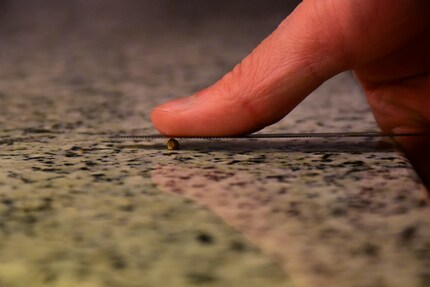
I get Demeter spelt grains from the farm shop in town (yes, there is one!). Important: these have to be washed to prevent any small stones damaging the grinder. You should also store the grain in a dark and dry place for no more than a year. Otherwise, the grinder can stick. That’s why I test my grain before milling it.
Source: Darina Schweizer
Step 1: Prep the bowl
Before I start milling, I can’t forget to place a container under the flour spout. Otherwise, I’ll be in serious knead of a cleaner. Haha.
Step 2: Select the degree of grinding
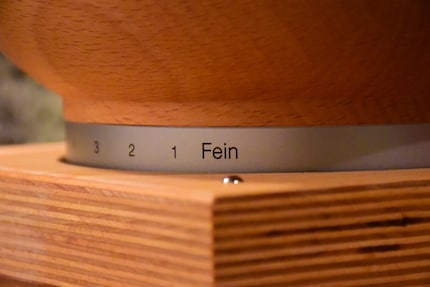
There’s a grey adjustment wheel under the funnel bearing the numbers 1 to 12, which I can use to adjust the degree of grinding (1=very fine, 12=very coarse). I start with a medium grind of 5.
Source: Darina Schweizer
Step 3: Turn on the grain mill
The mill should always be running before adding the grains to avoid overloading the grinder. I turn the adjustment wheel towards level 1 until the grinding stones start to crunch, then I turn it back slightly. This is how I grind the finest flour.
Step 4: Add grain
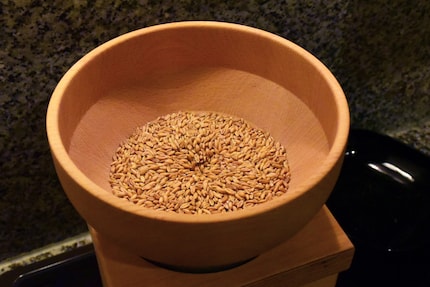
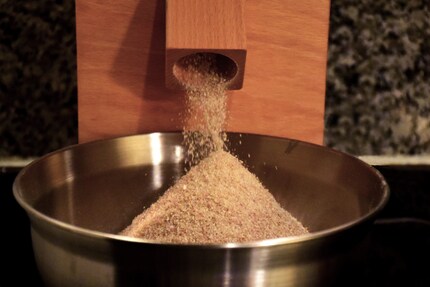
It’s showtime! I slowly pour the grain into the funnel. Within a few seconds, the first batch disappears, is ground and drops through the flour spout into my bowl.
Source: Darina Schweizer
Step 5: Repeat
If the consistency of the flour isn’t fine enough, I can pour it into the grain mill again. After trying the medium level (5), I kicked things up to the second finest level, 2. According to the instructions, this is sufficient for spelt.
Source: Darina Schweizer
Verdict
The result of my grain mill test is positive:
👍🏻Quality
The grain mill is made of very high quality solid beech wood. The built-in grinding stones are made of corundum ceramic. This is a hard, durable and robust artificial stone that sharpens itself during grinding.
👍🏻Use
The grain mill is also easy to use. All you have to do is switch it on and select the appropriate degree of grinding using the adjustment wheel. This doesn’t take long – just listen to the sound of the grinding stones (see step 3).
👍🏻Speed
In just one minute, you can grind 200 grammes of grain, so you can go through a kilogramme bag in five minutes. If you also want to make quick progress with your baking, I can recommend a bread maker that my colleague Debora swears by:
👍🏻Taste and consistency
There’s only one thing that beats homemade bread: homemade bread made from homemade flour. Bread couldn’t taste more intense! The consistency of my own flour seemed a little less homogeneous than shop-bought flour. But there’s barely any difference.
👍🏻Nutrients
The freshly ground grain is full of vitamins (website in German), minerals and trace elements (e.g. iron, magnesium and calcium). The homemade flour also provides unsaturated fat and amino acids as well as fibre.
Nevertheless, there are three negative points:
👎🏻Price
The grain mill is expensive. You won’t make the money back even with hundreds of homemade loaves. There are some grain mills in our shop that are cheaper than the Schnitzer Cerealo 200. The differences arise from how powerful the motor is, whether the housing is made of plastic or wood, whether the grinder is made of steel or stone and whether the drive is electric or manual. Stone generally grinds finer flour and the motor power and electric drive shorten grinding time. This and the good reviews of the Ceralo 200 convinced me despite its high price.
👎🏻Durability
You can only store your own flour for around three to four weeks. It’s best to use it immediately after grinding because the valuable substances break down rapidly as a result of oxidation.
👎🏻Volume
According to the instructions, the grain mill should be particularly quiet. Not for me. If you stand directly in front of it, the noise is almost deafening. Want to hear it for yourself?
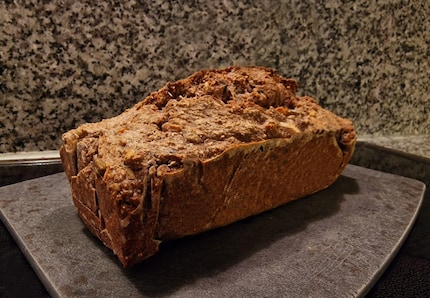
Even though I still need some practice for the perfect grind, I can save myself the trip to the supermarket bread shelf for now. For the short term, I’ll only be eating real bread – without the additives and air quotes. Just with a few nuts.
Source: Darina Schweizer
If you’re still looking for a recipe, my colleague Patrick Bardelli also bakes regularly:
Have you ground flour and baked bread yourself? What are your tips? Let me know in the comments.
I love anything with four legs or roots - especially my shelter cats Jasper and Joy and my collection of succulents. My favourite things to do are stalking around with police dogs and cat coiffeurs on reportages or letting sensitive stories flourish in garden brockis and Japanese gardens.


